
Apple Watch Strap Display Drawer
- Joe

- Mar 27, 2019
- 4 min read
If you own an Apple Watch then you know what its like to have multiple watch straps. They're great to have, you can swap and change them to suite your style but you have to store them somewhere. This Display Drawer should be the answer.
In this post I will show you how I made the Display Drawer. If you are interested in purchasing a Display Drawer for yourself, it is available to order here: https://www.averagejoesjoinery.com/product-page/apple-watch-strap-display-drawer
Materials Used:
European Beech
American Black Walnut
European Ash Veneer
18mm Plywood
Acrylic Paint
Tools Used:
Bandsaw
Planer
Orbital Sander
Chisel
Clamps
Paint Roller

To get things started I cut the beech to width at the table saw. The top piece was 19mm thick and was cut to 265mm wide. I also cut the 2 side pieces of beech to size, also 19mm thick but cut to 90mm wide.

With the pieces cut to width I moved over to the mitre saw to cut them to length. The top was cut to 335mm. The 2 side pieces got cut to 265mm.

After adding some wood glue, I clamped the 2 side pieces into place. They are held flush to the edge of the top piece. Wood glue alone is more than strong enough for this application.

Off camera I cut 2 pieces of 18mm plywood. The bottom piece measures 297mm x 265mm. The second piece, which will be the slide out part of the drawer, measures 280mm x 250mm. They both got an under coat of white paint. I left the edges that need glue later free from paint.

With the edges that need glue masked off, I sprayed the plywood pieces orange. Of course this could be any colour you like. The colour will only be seen when the drawer is opened or if you look underneath the piece itself.

I cut and planed 2 pieces of walnut over size. These will form the front and back of the drawer. They measure roughly 120mm x 350mm.

With the bottom piece of plywood clamped in place (as a spacer) I added wood glue to the back side of the beech pieces.

The walnut was then added and clamped in place. Being over sized, I didn't have to worry too much about its position. It will get flushed trimmed with the router later.
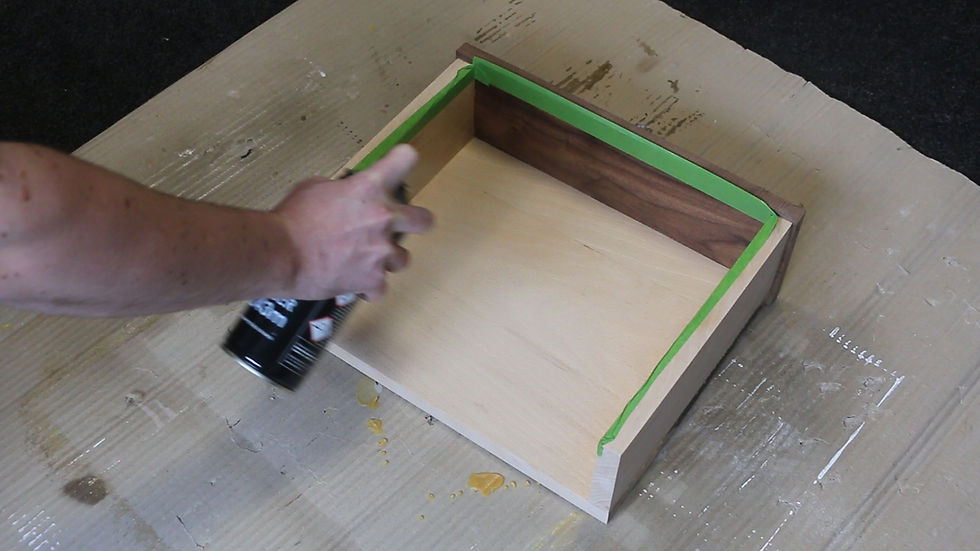
When the glue was dry I removed the plywood bottom and sprayed the inside with gloss lacquer. Its much easier to finish the inside now. I added painters tape to the edges where there will be glue later.


Before I glues in the plywood bottom piece I needed to add the drawer slides. There isnt enough space inside to do it later. As you can see they easily separate with the black tabs so I can remove the slide out section.

I added glue to 3 sides of the plywood bottom piece and clamped it into place. This still has the drawer slides attached.


The slide out plywood piece needed something extra. I added some self adhesive European Ash Veneer. To trim it to size I went around the edge with a chisel. It cut nice and easily. I printed off a template for the areas I needed to route away. These areas will be where the watch strops sit. I marked all 4 corners on each area, then joined those marks using a pencil and ruler.

I cut a scrap piece of plywood the same size as the distance from the straight edge of my router base to the edge of the router bit. This allowed me to simple lay the piece on the lines I marked, but up a straight edge to it and clamp it in place. That way I can be sure the router bit it perfectly inline with my marks.

It was then just a case of routing within the lines I marked. I did all the straight lines first.


With the long edges done. I moved my attention to joining them on the short sides. The same scrap piece of plywood was used to align my router.

With the edges all perfectly straight I could free hand remove the materiel inside the lines.

To cover the exposed plywood I painted the inside of the 'pockets' black. This is just regular black acrylic paint. Once it was dry I gave it 1 coat of lacquer to protect the paint.


To fit the walnut drawer front to the plywood slide out piece I drilled 4 holes for dowels. to align the holes I added centre markers to the holes and pressed them against the walnut. These left 4 indentations I could then drill fully to receive the wooden dowels.

Adding wood glue and the dowels offers a strong connection between the walnut and plywood.

When the glue was dry I fitted the slide out piece back onto the drawer slides and clamped the drawer shut. Using a flush trim bit in my router, I flush trimmed all the edges. Leaving the walnut oversized means its now a perfect fit.

I used a large radius round over bit for the 4 corners of the drawer. I made sure to go slow when routing the drawer front. The clamp helps to hold it but it can still move a little.


Lots of sanding followed. The drawer got sanded to 240 grit all over. Of course I left the painted sections untouched.

It then received 3 coats of spray lacquer. I sanded with 240 grit between each coat.

I drilled 2 shallow holes in the corners to add magnets. These were secured in place with super glue.

I did the same to the apposing corners on the drawer itself. The magnets will help keep the drawer closed tight and help it to appear and remove an slight gaps.

I decided the drawer needed an appropriate drawer pull. I went for an app icon shape. I think it fits well for this drawer. I created the shape on the belt sander. Adding a wooden dowel allowed it to simply be glued in place on the drawer front.

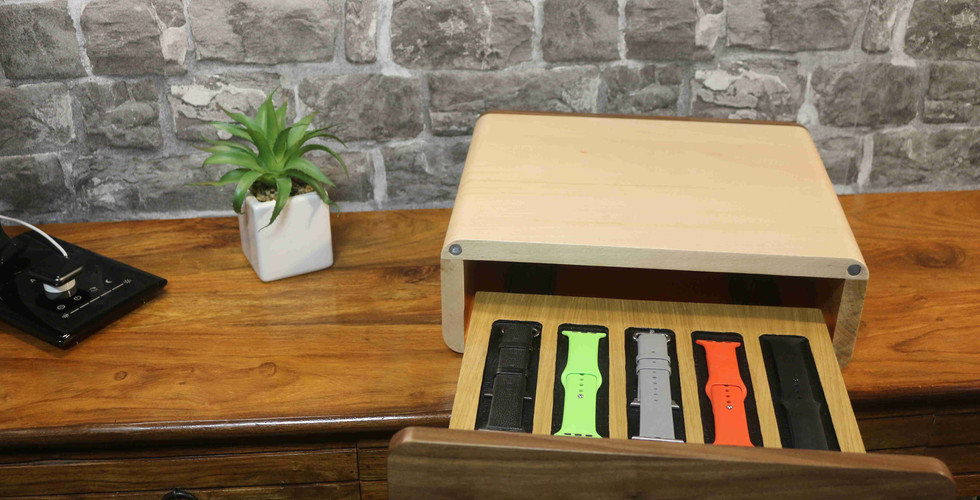
Here are the completed images. Please click through and let me know what you think. As I mentioned, you can order your Display Drawer here: https://www.averagejoesjoinery.com/product-page/apple-watch-strap-display-drawer


Comments